
I talk about chipping a great deal at The Grateful Golfer. The reason is because most amateurs, myself included, spend at least half the time chipping around the green during a 18 hole round. We know that greens in regulation or GIR is the king stat, however most of us are below 50% during most rounds. Hence, offering chipping tips is a great way to help you the reader and to focus my game in order to shoot low golf scores. And today, we are discussing the Green Dot Red Dot chipping tip.
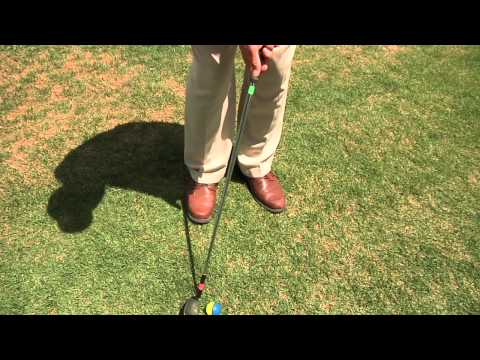
I came across this drill or visual cues presented by Minnesota PGA Professional Greg Schulze. It is simple and offers a visual representation of how our clubhead and hands should work in unison while chipping around the green. It is simple to understand and is another way to explain the relationship between our hands and clubface while trying to improve our up and down stat. Take a look:
The simple concept of placing red/green dots on our club during practice is a good idea to help develop what the club position should look like during contact. Opening your stance and placing more weight on your lead foot is also important as it places your body in the proper position to chip the ball. One last tip would be to ensure you watch the club make contact with the before looking up to see where your ball is traveling. Oh yead, one last tip (it never ends) pick a landing area.
The Green Dot Red Dot tip is simple and easy to apply. It will help you keep your club in the proper position while chipping. After a short time, you will not need the dots as you will have a visual cue through the shaft angle to help improve your chipping around the green. If you give it a try, drop me a line to let me know if it works.
I am a grateful golfer! See you on the links!